
Lately I got my hands on a cool new project, utilizing a Cisco PrecisionHD TTC8-02 Telepresence camera (More to come…).
In this blog post I want to comapre two different methods to capture this camera, using a HDMI grabber, in 1080p30 (1920×1080 pixels with 30 FPS), using a Raspberry Pi 4B (2GB in my case).
Preparation
Before starting, I installed Pi OS (Bullseye) on my device.
I did all the following tests, using a WIFI-Connection on the Pi and OBS (media source) as a client. As the builting WiFi was not feasible enough in my case, I added an external WiFi-Stick.
This post will not cover installing OBS, a Wifi Driver or Pi OS etc.
To use the hardware acceleration for encoding, we have to add this line to /boot/config.txt:
dtoverlay=vc4-fkms-v3d
Why external WiFi?
Originally I wanted to use Dicaffeine to NDI-Stream the HDMI source using a cheap USB HDMI Grabber (Ref-Link) from Amazon.
I did not manage, to receive the vido on my PC. I always saw the source, but never received a frame. Even with a custom-compiled FFmpeg I got no success using NDI at all. Not even a 720p5 test video. On Ethernet, all worked fine.
This lead me to further diagnostics… In my environment, WiFi is a nighmare. Long story short, I did some download tests:
| Connection | Measured speed |
| Builtin WiFi 2,4GHz | 300 kB/s |
| Builtin WiFi 5GHz | 0.5 – 1 MB/s |
| External ancient WiFi “g-Standard” dongle (2.4 GHz) | 3 MB/s |
| New external WiFi Dongle with external antenna | 160 MB/s |
I think the results and my reasons to use an external adapter are quite clear. In my case, the driver had to be compiled manually and required setting arm_64bit=0 in config.txt. I am pretty sure it will also work with internal WiFi in cleaner air 😉
Test environment
I created a busy scene on my desk. Then I positioned the camera and did wire it directly with the USB grabber, which is connected to the Pi’s USB2 interface (The stick is only using USB2).
For the CSI module tests, I got my hands on this CSI-2 connected HDMI-grabber. For these tests, I removed the cable from the USB-Grabber and connected it to the CSI-Grabber.
All hardware configurations have been made before the tests, so the environment is identical on all tests. Both grabbers were always connected but the other inactive at the time of testing.
The Pi sits in a case (ref link) that is cooled by a small “Pi Fan”.
I installed gstreamer from the official repo using th following command. Please not, it installs quite everything…
apt -y install libgstreamer1.0-dev libgstreamer-plugins-base1.0-dev libgstreamer-plugins-bad1.0-dev gstreamer1.0-plugins-ugly gstreamer1.0-tools gstreamer1.0-gl gstreamer1.0-gtk3Installing the Grabbers
Installing the USB-Grabber is easy. Connect it -> works. It does not require any configuration or setup.
The CSI-Grabber is a bit more complicated:
First of all, update your system (apt update && apt -y full-upgrade), then enable the overlay by putting this line into /boot/config.txt:
dtoverlay=tc358743This can be a second line, right below the previously added line.
Then we need to edit /boot/cmdline.txt and add cma=96M to the beginning, The whole line will start like this:
cma=96M console=tty1 root=PARTUUID=...After a reboot, the device should be up and running.
Warning: In the following commands, I am always using /dev/video0 for the CSI and /dev/video1 for the USB-Grabber. Adapt the commands to your setup. If you only have one, it is likely /dev/video0
Setting up OBS
You can use any receiver software of course, but I an using OBS as this camera will be used for streaming later on. The media source must be set up like this (use your Pi’s IP address instead of 111.222.333.444):
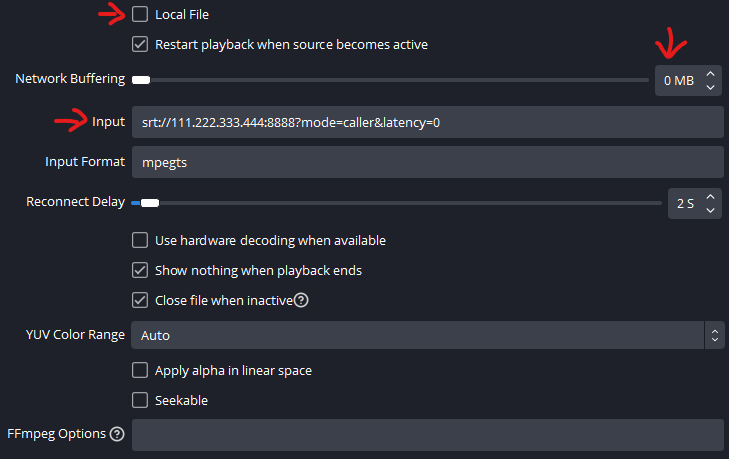
Actually, I did not notice any difference without latency=0 but I read somewhere, this was an option to reduce buffering.
Running an SRT-Stream using the USB-Grabber
Now that OBS is set up, we can start the stream (or we could do this before OBS is up). The following command works pretty well for the USB-Grabber:
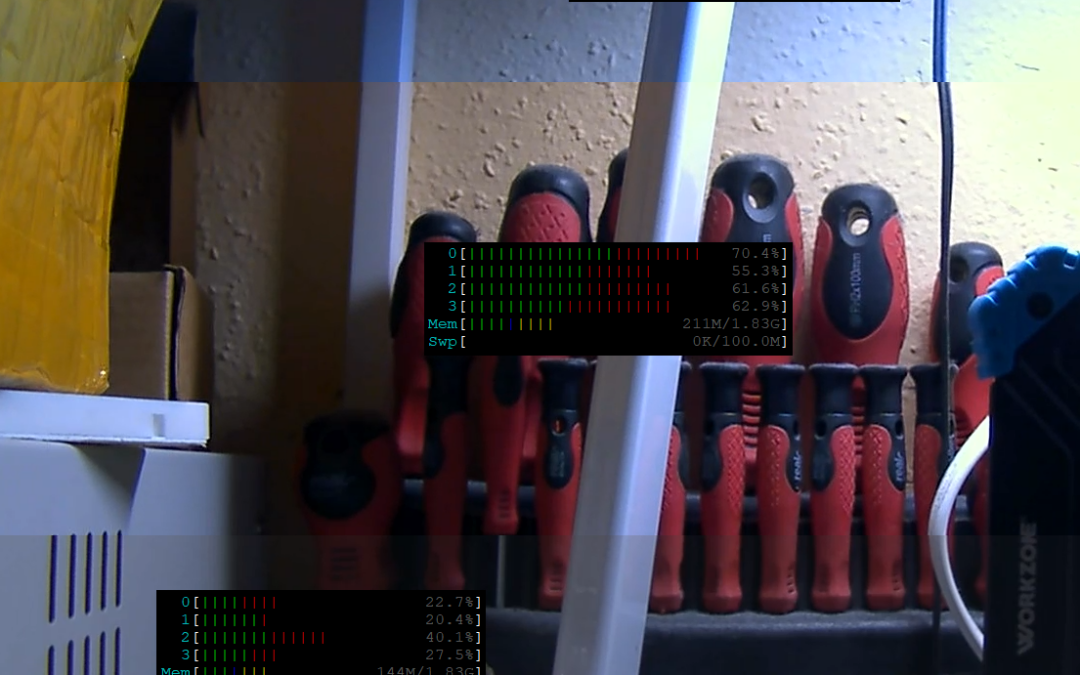
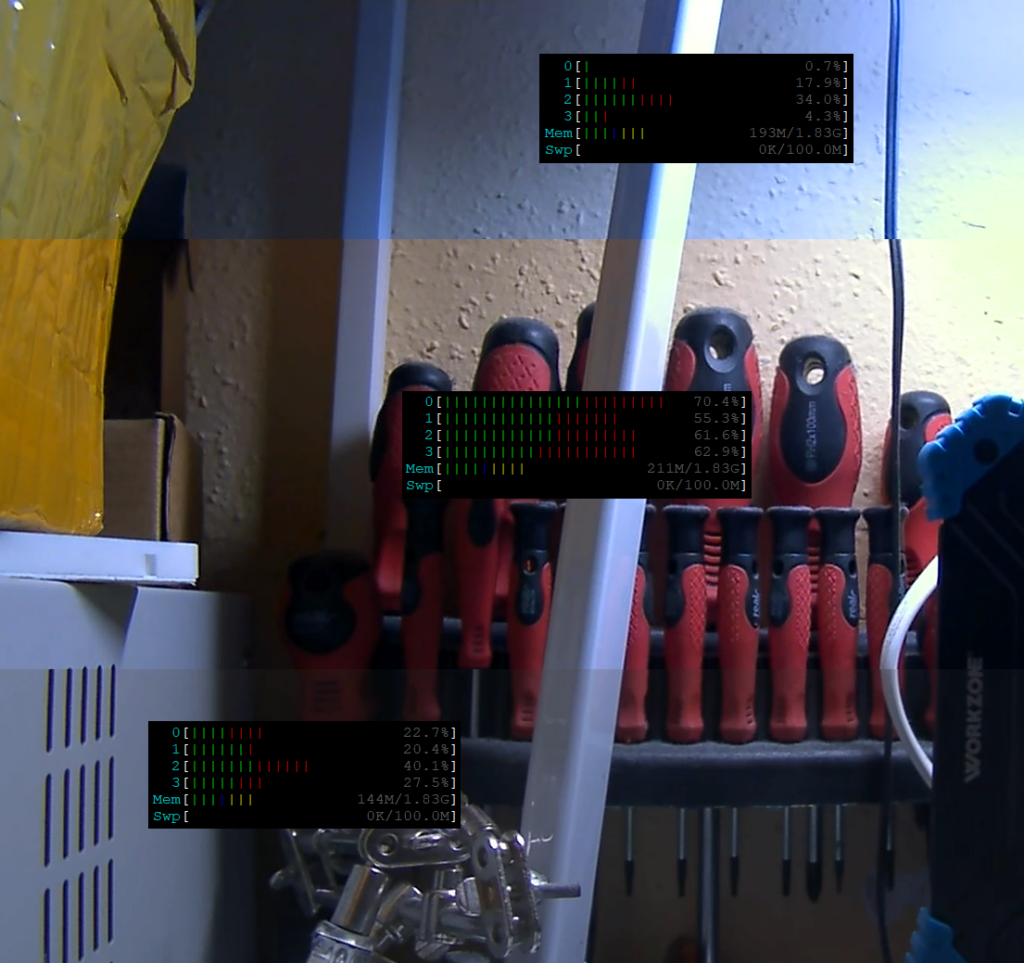
gst-launch-1.0 -vvv v4l2src device=/dev/video1 ! 'image/jpeg,colorimetry=2:4:5:1,width=1920,height=1080,framerate=30/1' ! jpegparse ! v4l2jpegdec ! v4l2convert ! v4l2h264enc ! "video/x-h264,profile=main,preset=veryfast,framerate=30/1,level=(string)4,tune=zerolatency" ! mpegtsmux ! srtsink uri=srt://:8888Using this command, the delay (cam to OBS) is about 1 second in my environment. The color quality is good and the framerate is consistent after a few minutes runtime.
This command lowers the delay to about 0.8 seconds by using the basline profile but the color quality is much worse (see the comparison below). CPU-Usage and framerate are widely identical:
gst-launch-1.0 -vvv v4l2src device=/dev/video1 ! 'image/jpeg,colorimetry=2:4:5:1,width=1920,height=1080,framerate=30/1' ! jpegparse ! v4l2jpegdec ! v4l2convert ! v4l2h264enc ! "video/x-h264,profile=baseline,framerate=30/1,level=(string)4,tune=zerolatency" ! mpegtsmux ! srtsink uri=srt://:8888
The same, using the CSI-Module
Then I did the same expriment, using the CSI module (ref link) C790 from Geekvideo. Here we need some more setup before we are able to stream.
Unfortunately this need to be done after each reboot, else GStreamer will not start. Again: this is not a tutorial but a technical experiment and report, so maybe I will come up with a solution later.
Step 1: Create an EDID file
Create a file, called edid.txt, containing the following – copy exactly!
00ffffffffffff005262888800888888
1c150103800000780aEE91A3544C9926
0F505400000001010101010101010101
01010101010100000000000000000000
00000000000000000000000000000000
00000000000000000000000000000000
00000000000000000000000000000000
0000000000000000000000000000002f
0203144041a22309070766030c003000
80E3007F000000000000000000000000
00000000000000000000000000000000
00000000000000000000000000000000
00000000000000000000000000000000
00000000000000000000000000000000
00000000000000000000000000000000
00000000000000000000000000000003
Source: https://forums.raspberrypi.com/viewtopic.php?t=315247#p1885669
This file controls the capabilities, the adapter advertises on HDMI to the source device. This specific variant locks it to 1920x1080p30. The file can of course be re-used for later reboots.
Step 2: Apply EDID-Info and configure Video4Linux driver
First, apply the EDID-File to the device using
v4l2-ctl --set-edid=file=edid.txt -d /dev/video0
Next, we configure Video4Linux to the correct timings:
v4l2-ctl --set-dv-bt-timings query -d /dev/video0
Step 3: Run GStreamer
gst-launch-1.0 v4l2src device=/dev/video0 ! 'video/x-raw,framerate=30/1,format=UYVY' ! v4l2h264enc ! 'video/x-h264,profile=main,preset=veryfast,level=(string)4,tune=zerolatency' ! mpegtsmux ! srtsink uri=srt://:8888
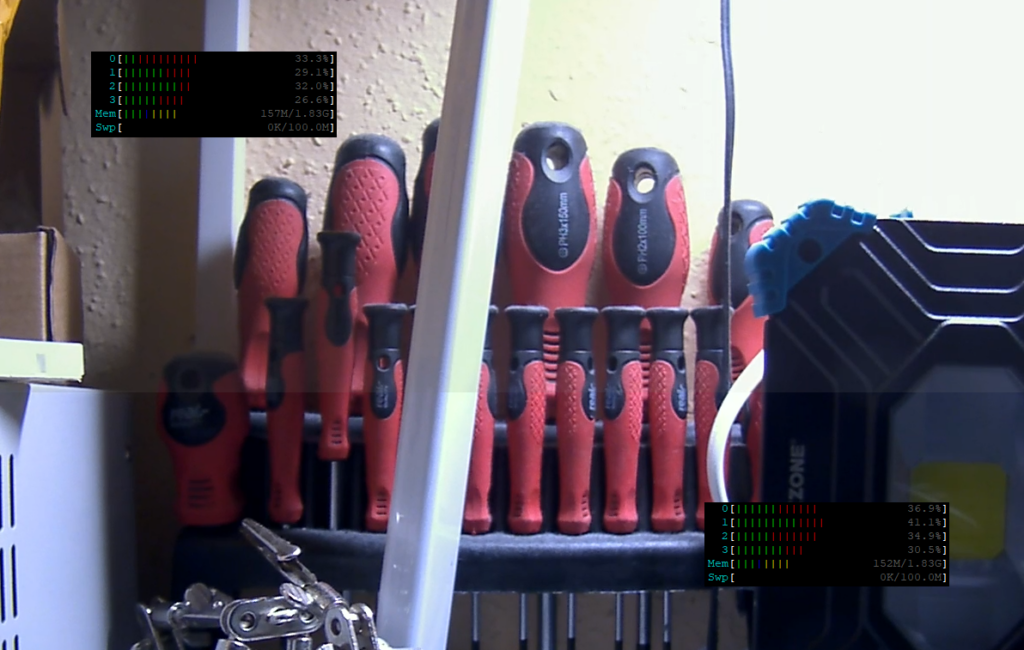
This variant caused slightly higher system load than the “bad color” USB variant, causing a lower delay of only 0.4 – 0.6 seconds
Image comparison
I created a side by side comparison image using the two grabbers. From top to bottom:
USB with baseline profile / USB with main profile / CSI with main profile
As you can see, the USB-Main variant has the best image quality, directly followed by the CSI-Variant. I think this could possibly be tuned further but as we’re using the same encoding settings, I fear that it comes largely from the chip.
Regarding load, the CSI-Approach is the clear winner when relating quality with load.
The next day… RGB!
A day later, I remebered that I read somewhere, this CSI-Thing would be capable of UYVY as well as RGB. So I gave this another shot. Here is the commandline:
gst-launch-1.0 v4l2src device=/dev/video0 ! 'video/x-raw,framerate=30/1,format=RGB,colorimetry=sRGB' ! capssetter caps="video/x-raw,format=BGR" ! v4l2h264enc ! 'video/x-h264,profile=main,preset=veryfast,level=(string)4,tune=zerolatency' ! mpegtsmux ! srtsink uri=srt://:8888
And this is the result comparison. Delay is identical to the UYVY variant, system load is slightly higher. I think the colors are a little better (bottom is RGB, top is UYVY)…
…but compared to the USB-Grabber, the result is still worse – USB top, CSI bottom:
I also got knowledge about a new chip (Thank’s to pr3sk from JvPeek’s Discord), built into newer USB 3 grabbers. I just ordered one of these and will report in a seperate post, if those are maye “the solution” to everything 🙂
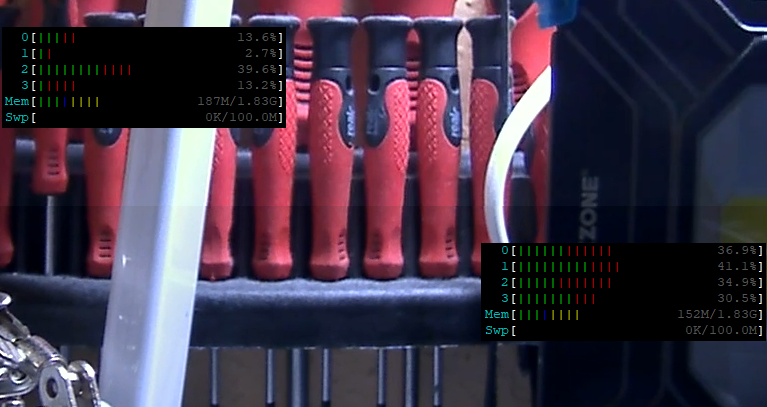
Interestingly, the CPU-Usage while grabbing from USB was much lower this time.. I got no idea why… Maybe the load comparison from yesterday was garbage…
End-Results
I can say that both approaches seem to work. It looks like the USB-Variant is a bit less stable (in a few tries, the stream freezed after a few seconds).
After all, I am not really sure how to proceed. The CSI-Variant is much more performant and never had an outage while testing. Regarding image quality the USB-Variant (with main profile) is clearly better.
I am not a gstreamer pro, so maybe someone has ideas on how to improve these pipelines? Feel free to comment!
Updates
- August, 22: Added source declaration and further explaination to EDID-File
- August, 22: Added section “The next day”